Axis2 Web Service using Eclipse
There are different web service implementation engines available for Java. Axis2 from Apache is the popular web service stack. In this hello world tutorial, we will use Axis2 for implementing a simple web service using Eclipse wizards. Eclipse does not come with pre-configure Axis2 setup. So the key to creating a web service using Eclipse for Axis2 is setting up the Eclipse.

Step 0: Eclipse Preparation for Web Service with Axis2
See when we are lazy and want all the job to be done by an IDE, we should have the right setup and configuration. To create a RESTful webservice with Axis 2 using Eclipse wizard ensure the following.
- Use Eclipse Java EE IDE for Web Developers.
- Have the latest Dynamic Web Module updated. It is better to use 2.5 of dynamic web module version. Simple and easy way is to have a latest IDE download as it will come bundled with latest modules.
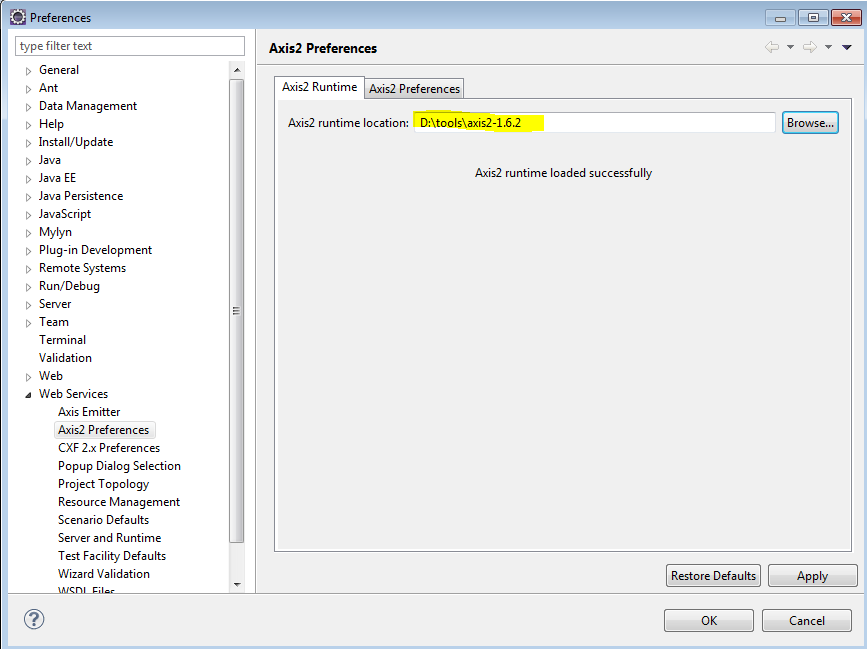
- Download Axis2 binary from Apache Axis website download page, unzip it and configure that foder in Preferences -> web service Axis2 runtime (refer image below)
If you are in a hurry, just download Axis2 Web Service and Client project and execute it. You should add Axis2 jars in lib folder.
Step 1: Create Dynamic Web Project
We all know how to create a dynamic web project for Java in Eclipse as it is what we do daily in our office.
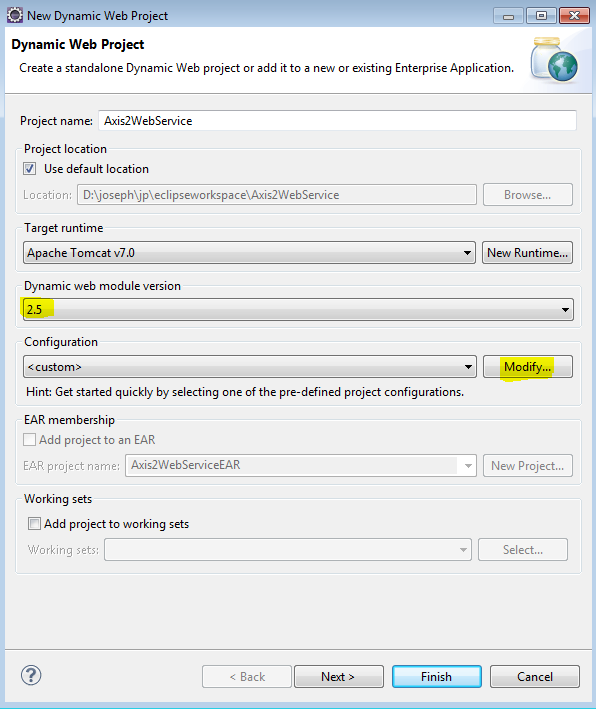
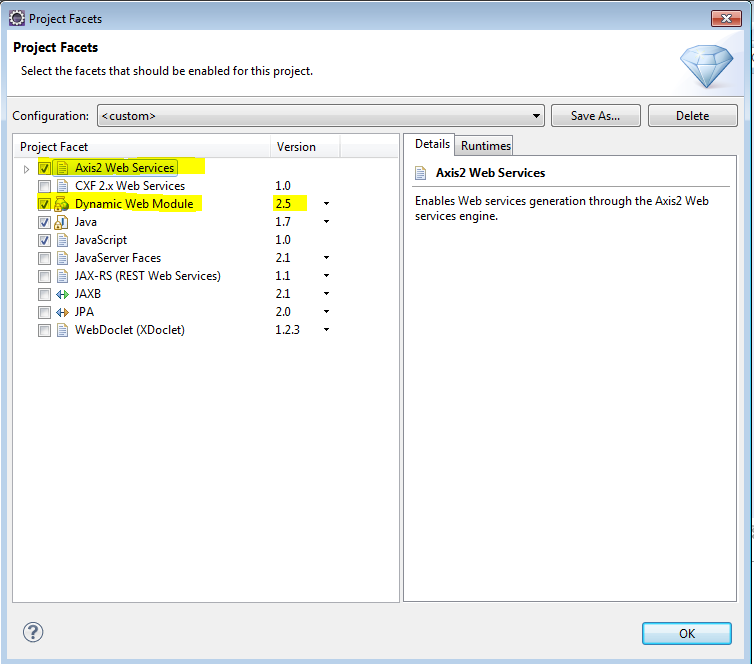
To create a web service using Axis2 we should add a step. Just do not go with the default runtime (server) configuration. We need to add Axis2 Web Services in Project Facets. Click Modify button for server runtime configuration while creating the dynamic web project and select the Axis2 Web Services Project Facet.
Then click next, next, next … done. A brand new Java dynamic web project is created with runtime support for Axis2 web services.
Step 2: Create Web Service Java Class – Bottom up style
It is going to be simpler than expected. We will use the bottom up style for web service creation. First we will create the Java class and generate the WSDL out of it. Create a new Java class with a method that will serve as the heart of web service.
package com.javapapers.webservice;

public class Axis2HelloWorld {
	public String helloWorld() {
		return "Hello World";
	}
}
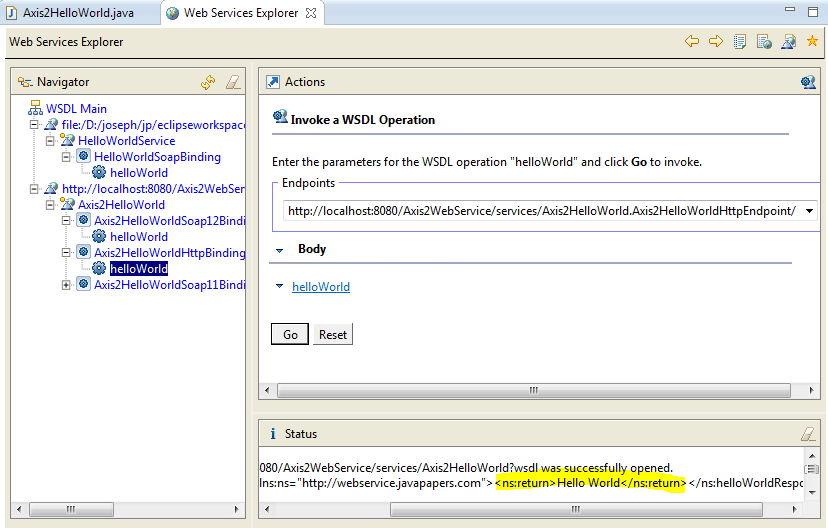
Step 3: Create Axis2 Web Service and Client using Eclipse Wizard
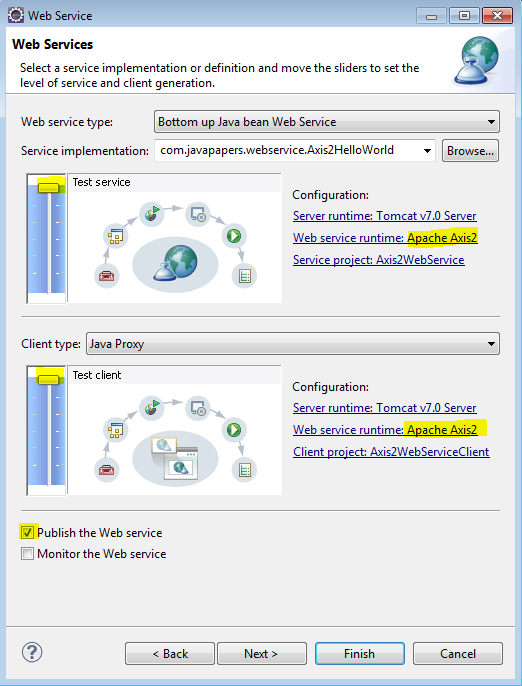
Just the wizard job is remaining. Now use the create new web service wizard. Choose the service class that was created in the previous step and click next to finish. If you choose the web service client generation, then we will get a separate web application generated by Eclipse. Thats it, we have created a hello world Axis2 web service and client using Eclipse.
Here I found this source code from javapapers.com Download Axis2 Web Service and Client project. You should add Axis2 jars in lib folder.
This Web Service tutorial was added on 16/12/2012.
My first angular app
As Hello word program there are few basic things to know in angular.
- What is angular
- How to use
- When to use
- Basic structure or tags
Misko Hevery, of Google, is the founding co-author of AngularJS. There's couple of things in Angular make it special. First of all, we have dependency injection, which is very unique. Nobody else has that. But I think that the thing that really hits it home for people is that we have this idea of a directive. Rather than writing everything inside of JavaScript and then having a bunch of templates to generate the UI, you write a lot of it in HTML and HTML drives the assembly of the application. It's kind of the reverse thing. It's very unique. No other Jframework had it till Angular brought it.
Want to know more..
<!DOCTYPE html>

<html>
<head>
    <script src="https://ajax.googleapis.com/ajax/libs/angularjs/1.3.8/angular.min.js"></script>
</head>

<body>

    <div ng-app="HelloWorldApp" ng-controller="HelloWorldController">

        <h1> Hello <text ng-bind="who"> </h1>

    </div>

    <script>

        var HWApp = angular.module('HelloWorldApp', []);

        HWApp.controller(
              'HelloWorldController',
            ['$scope', function ($greet) {
                $greet.who = 'World!';
            } ]
        );

    </script>

  </body>
</html
How to use angular in your application? Just add ""to the html file.Else download Angular.js or Angular.min.js add the path with "script" as similar to the above. But make sure you do it before you call any Angular directive in the code.
When to use angular? Angular enable two way binding. Fast scripting. Support for lot of functions you want to add in to the website.
Let's see how it works.
It starts with adding "
Basic directives need to know in Angular are "ng-controller" defines the controller function to handle the DOM."ng-bind" It's really easy way of binding dynamic data.
We are good to go now. The first angular application.
Hello